| |
 Reload this site. Reload this site.

The Computer Page Not just games!

See my Xine review too!
Computer Related Stuff Up Gallery.
Windows XP Tweaks.
Are you looking for software to download? Youre on the wrong page.  You need to go here: You need to go here: 
GAMES:
   
   
Morrowind Tips & Recommendations. 
Some Of My Other Recommended Games Of Goodness:
• RollerCoaster Tycoon — some bonus tracks / rides here.
Diablo 2
Check out the NFS Porsche 2000 Page and the NFS High Stakes Page for some cool replays of mine!
OTHER STUFF:
     
Sometimes I refer to various software running on one of my computers, so here are the current specs! (All hard drive sizes are in true GB, with the base 1024 thing.):
2023 Tower Computer (The new main one.)
| CPU: |
(64 bit) Intel Core i3 6100 (Hyper Threaded Dual Core - 3.7 GHz)
|
| Motherboard: |
MSI B150M PRO-VD
|
| RAM: |
8 GB
|
| Video Card: |
None. Im using the built in Intel thing.
|
| Hard Drives: |
465 GB internal drive and 931.5 GB secondary one in a USB connecting caddy.
|
| DVD Writer: |
LG M Disc, or something.
|
| Sound Card: |
None yet. Im just using the built in Realtek thing.
|
| Keyboard: |
Logitech Internet Keyboard (104 keys I think.)
|
| Mouse: |
Microsoft basic optical mouse
|
| Monitor: |
51.05 cm Hewlett Packard LP2065 LCD. (Maximum Resolution: 1600 × 1200 pixels.) Its about 40.5 cm × 30.5 cm.
|
| Control Pad: |
XBOX 360 Controller
|
| OS: |
Windows 7 Professional (64 bit)
|
2006 Tower (Main) Computer (Now dead.)
| CPU: |
64 bit AMD Athlon 3800+ (Single core - 2.4 GHz)
|
| Motherboard: |
Asus A8V-MX
|
| RAM: |
1 GB DDR type
|
| Video Card: |
ATi Radeon 9550 (AGP type with 256 MB of RAM.) (Was a nVidia GeForce 7600 GT [AGP type with 512 MB of RAM] until it died.)
|
| Hard Drives: |
Removed for other PCs
|
| DVD Writer: |
Lite On 8-ish × speed. Not quite sure. (Was a Pioneer 16 × speed [DVR-111D] up until it died.)
|
| CD Writer: |
Lite-On 48 × speed (24 × speed re-write)
|
| Floppy Disk Drive: |
Standard 9 cm type
|
| Sound Card: |
Creative Sound Blaster Audigy
|
| Video Capture Card: |
Pinnacle Systems Studio 500 (PCI) with Studio 10.5
|
| Modem: |
Netcomm Roadster II (Ultra) 56 (No longer using this now, because of the broadband Internet connection.)
|
| Keyboard: |
None. It was moved to my 2023 PC.
|
| Mouse: |
None. Moved to my 2023 PC.
|
| Monitor: |
Also moved to my 2023 PC.
|
| Control Pad: |
Not really applicable any more
|
| OS: |
Windows XP Professional (32 bit) Moved to VirtualBox on my 2023 PC
|
Laptop Computer (MacBook)
| CPU: |
2 GHz Intel Core 2 Duo (Only runs at half speed, since the battery snuffed it.)
|
| RAM: |
1 GB DDR 2 type
|
| Video Processor: |
Intel GMA 950 with 64 MB of shared RAM
|
| Hard Drive: |
465 GB serial type (3rd hard drive now.)
|
| Optical Disc Drive: |
8 × speed for DVDs, 24 × speed for CDs. (16 × speed re-write for CDs.) (CD burning only.)
|
| Sound Processor: |
?
|
| Keyboard: |
78 key American style layout, I fink
|
| Mouse: |
Not using one for this currently.
|
| Screen: |
33.782 cm thin film transistor liquid crystal display (Maximum Resolution: 1280 × 800 pixels.)
|
| Camera: |
iSight — appears to do 640 × 480 pixels
|
| OS: |
Mac OS X Leopard
|
| Modem: |
External Apple Modem (Probably wont need this again.)
|
Desktop Computer (iMac G4)
| CPU: |
800 MHz IBM PowerPC G4 (7445)
|
| RAM: |
512 MB
|
| Video Processor: |
nVidia GeForce 2 MX (32 MB of DDR RAM)
|
| Hard Drive: |
55 GB
|
| Optical Disc Drive: |
6 × speed for DVDs, 24 × speed read for CDs, 8 × record, and re-writes at 4 × speed. (CDs recording only.)
|
| Sound Processor: |
Some Texas Instruments thing
|
| Keyboard: |
109 key Apple Keyboard
|
| Mouse: |
Whatever mouse is free.
|
| Screen: |
38.1 cm LCD (Maximum resolution: 1024 × 768 pixels.)
|
| Modem: |
Dash2
|
| OS: |
Mac OS 9 and Mac OS X Tiger
|
2nd Tower Computer (Now dead-ish)
This computer is partially working, but is probably quite unreliable.
| Motherboard: |
Gigabyte B75M-D3H (Ultra Durable 4 Classic)
|
| CPU: |
3.2 GHz Intel Core i5 (Quad core)
|
| RAM: |
4 GB - DDR 3 type
|
| Video Card: |
Removed for the replacement (4th tower) computer
|
| Hard Drive: |
Some old ~465.76 GB one that is mostly working.
|
| DVD Writer: |
Removed for the replacement (4th tower) computer
|
| Sound Card: |
Creative SoundBlaster Audigy
|
| Keyboard: |
Removed for the replacement (4th tower) computer
|
| Mouse: |
Removed for the replacement (4th tower) computer
|
| Monitor: |
None
|
| OS: |
None
|
| Control Pad: |
None
|
3rd Tower Computer (Power Mac G5)
This computer is partially dead. It has some heat related fault, which MAY be the power supply or logic board.
| CPU: |
2 GHz IBM PowerPC 970MP (Dual core.)
|
| RAM: |
2 GB
|
| Video Card: |
nVidia GeForce 6600 LE (128 MB of RAM. PCI Express.)
|
| Hard Drive: |
~ 149.1 GB Western Digital (possibly dead) & 931.5 GB Seagate (ST1000DM003-1SB10C)
|
| Optical Disc Drive: |
Pioneer (DVR-115) 18 × speed DVD burner
|
| Sound Processors: |
Burr Brown PCM3052 & Crystal Semiconductor CS84xx
(Has both optical and electrical connections.)
|
| Keyboard: |
The same one Im using for my 4th tower computer. (Shared via the KVM switch box thing.)
|
| Mouse: |
The same one Im using for my 4th tower computer. (Shared via the KVM switch box thing.)
|
| Screen: |
My HP LP2065 monitor.
|
| OS: |
Mac OS X Tiger & Leopard
|
2nd Laptop Computer (HP Compaq nx7400)
| CPU: |
1.66 GHz Intel Core 2 Duo
|
| RAM: |
2 GB
|
| Video Processor: |
Intel GMA 945 (Possibly with 224 MB of shared RAM)
|
| Hard Drive: |
~ 55.8 GB
|
| DVD Writer: |
?
|
| Sound Processor: |
ADI SoundMAX
|
| Keyboard: |
(The built-in one)
|
| Mouse: |
Microsoft Basic Optical Mouse 2
|
| Screen: |
1280 × 800 pixel LCD
|
| OS: |
Windows 2000 Professional
|
| Control Pad: |
None at the moment.
|
4th Tower Computer (The 2018 one.)
| Motherboard: |
Gigabyte H67MA-USB3-B3
|
| CPU: |
3.4 GHz Intel Core i7 (Quad core)
(Will go up to about 3.8 GHz if it needs to.)
|
| RAM: |
8 GB DDR 3 type.
|
| Video Card: |
nVidia GeForce GT 640 (1 GB of RAM. [May share another 3 GB of system RAM.] PCI Express)
|
| Hard Drives: |
~ 465.76 GB HGST
|
| DVD Writer: |
Super WriteMaster (Not sure how fast.)
|
| Sound Processor: |
Some kind of built-onto-the-motherboard dealie (RealTek or something.)
|
| Keyboard: |
Generic Microsoft keyboard
|
| Mouse: |
Microsoft Basic Optical Mouse 2
|
| Displays: |
My TV (A 68 cm Philips 29PT3323 model) using a Gefen converter, and my main computers monitor, on connection 2.
|
| OS: |
64 bit Windows 7 Professional (NT 6.1)
|
| Control Pad: |
My XBOX 360 one.
|
| Scanner: |
Epson Perfection V370 Photo
|
2nd desktop type computer (iMac G5)
| Motherboard: |
Apple iMac G5 type, I presume.
|
| CPU: |
2.1 GHz IBM PowerPC G5
|
| RAM: |
1.5 GB
|
| Video Processor: |
ATi something
|
| Hard Drives: |
~ 238 GB
|
| DVD Writer: |
Not sure at the moment
|
| Sound Processor: |
Dunno that either
|
| Keyboard: |
Logitech keyboard
|
| Mouse: |
Dell optical mouse
|
| Displays: |
1680 × 1050 pixel LCD
|
| OS: |
Mac OS X Leopard. (Tiger on an external drive.)
|
| Control Pad: |
None.
|
I did a comparison between my computers rendering the same scene with the same settings in Art Of Illusion 2.5. The setup was an image size of 1600 × 1200 pixels with the raytracer renderer, a surface accuracy of 0.01, maximum anti-aliasing, 4 rays minimum per pixel, 16 rays maximum per pixel, gloss & translucency on, soft shadows on, maximum ray tree depth of 16, no HDR background & everything else on default. These are the times each computer took to complete the image. (Please note that the longer time mentioned at deviantArt was a resolution of 3000 × 2250 pixels.)
| 1st Tower Computer (AMD Athlon 64 based one): |
24 minutes & 8 seconds |
| 2nd Tower Computer (Intel Core i5 based one): |
2 minutes & 40 seconds |
| Laptop Computer 1 (MacBook): |
13 minutes & 28 seconds |
| Laptop Computer 2 (H.P. Compaq nx7400): |
17 minutes & 57 seconds |
| Desktop Computer (iMac G4): |
1 hour, 48 minutes & 48 seconds |
| 3rd Tower Computer (Power Mac G5): |
17 minutes & 32 seconds |
| 4th Tower Computer (Intel Core i7 based one): |
1 minute & 17 seconds |
| iMac G5: |
32 minutes & 45 seconds. |
So my new Power Mac G5 only just scraped in a quicker time than my HP laptop computer. It goes to show how much more efficient the Intel Core 2 Duo CPUs must be, even at slower speeds. See this chart for a more visual comparison.
One thing I have a beef with in terms of computers, is the ambiguity of the new solid state drives, as regular hard disks all used solid state components as well. Computers havent used valves for decades. So how can you distinguish between 2 types of drive, when the term applies to both? (When radios first began to use transistors they correctly mentioned that they used solid state components instead of valves [which have a vacuum] and this really did give a more correct distinction.) If anything, the distinguishing feature of the new storage is that it uses static components, because theres no moving parts. A disk is still solid. It isnt a vacuum, a liquid or a gas.
I also hate how Microsoft has the tendency to refer to zip files as folders, because of the stupid way Windows XP handles them by showing them as a folder. Maybe they think people cant get their head around a file containing other files.
Tips For Firefox / Pale Moon!
Since web browsers are not always OS specific, Ill put this bit separately. (Although Pale Moon is only for Windows. And now Linux too apparently.)
To disable image smoothing in newer versions of Firefox / Pale Moon, go to the chrome sub-directory of your user profile directory. (In Windows XP, it should be something like: C:\Documents and Settings\User\Application Data\Moonchild Productions\Pale Moon\Profiles\blahblah.default\chrome. In Windows 7, its: C:\Users\your name\AppData\Roaming\Moonchild Productions\Pale Moon\Profiles\blahblah.default\chrome\ You may have to make the chrome directory in later versions.) If you dont have one already, make a text file there called userContent.css and in it, put:
img { -moz-scaling-method: fast }
img { image-rendering: -moz-crisp-edges; }
I got this info on a forum, which you can read here. It will work in Pale Moon 20 & 27, as Ive tried it. Of course, all resized images you see will then be pixelated at larger sizes. Smaller images will look unfiltered too. In some instances this can be beneficial to pick up on images which have not had their size correctly set in the web page, and for images which are meant to be shown at twice the size without filtering, which my site uses in a couple of instances.
In the advanced settings, (which you access by putting in the address about:config,) you can also disable high quality down scaling. There will be an entry called image.high_quality_downscaling.enabled. If you set it to false, images which have been shrunk wont have the sharpening effect applied. This can improve performance a bit and stop the refresh flickering which sometimes occurs.
One of the most powerful ways to block specific content, is an add-on / extension called BlockSite. It can be used with asterisks (*) to block multiple stuff from the same domain, and it can also disable links to such sites. Its great for removing common advertising sites and anything you might find offensive. Some sites use a lot of external tracking and statistic gathering sites, which can be stopped, and thus speeding up loading times.
If you dont want sites to set cookies, you can set the Keep until: part of the privacy tab in the regular options to ask me every time. The only thing about this you need to be aware of, is that every site you then visit which uses cookies will be halted until you choose whether to accept the cookie or not. Some sites also expect cookies to be allowable.
If youre finding some web sites are using fonts which are just way too thin for their size, one trick you can use is to disable sites from using their own fonts. However, this may present problems for some sites which rely on particular fonts to achieve a certain look. In any case, go into the usual about:config dealie, and type in font in the search box. Next, find gfx.downloadable_fonts.enabled and set it to false, by double clicking it. When you restart Pale Moon (or Firefox), only fonts installed for your OS will be used.
If youre finding youre tweaking a lot of advanced settings, create a bookmark for about:config, or place it in your bookmarks toolbar.
If your browser is whinging about vulnerable plug-ins, but you still want to use the version you have installed, you can skip the warning message by changing the extensions.blocklist.enabled setting to false. (Do this in the advanced settings by using the about:config address.)
In Windows, to force Firefox to start with the profile selector, add a -p to the end of the command line, either in a shortcut to the program or a batch file.
To disable Firefox 52s (and probably surrounding versions) built-in font rendering method (in Windows), go to the about:config address, and search for azure. Change the settings of gfx.canvas.azure.backends & gfx.content.azure.backends to direct2d1.1,cairo without the part that says skia. Fonts will then be displayed how Windows normally does them. Smaller fonts will have no anti-aliasing at all, and larger fonts should be sharper now, horizontally.
Tippy Tips For Mac OS X (Tiger & Leopard)!
Mac OS X isn’t anywhere near as annoying as Windows XP, so this section will probably be a bit sparse.
• If you don’t have an iPod, you can disable the iTunes Helper application on start up. Go to the System Preferences, and then Accounts. Go to the Login Items section, select iTunesHelper and click on the “-” button. Then restart your computer. (No this isn’t an annoyance.)
Mac OS X Leopard (& probably later versions,) puts extra junk onto external drives to do with Spotlight. If you want to prevent this, put a blank file in the root level of the drive called .metadata_never_index with no name apart from the extension. This will make ejecting the drive faster too.
Mac OS X Leopards folders are nowhere near as good as the old shiny blue ones in my opinion, so if youre like me and you have an earlier revision of the OS still, you can change them back. The directory where theyre stored for Leopard is: /System/Library/CoreServices/CoreTypes.bundle/Contents/Resources/
You can find several in there for different special directories too, like the Utilities folder, Developer, Public, Pictures and Music folders. You will most likely need your administrator password for this too.
If youre looking for your Finder icon, thats located in /System/Library/CoreServices/Dock.app/Contents/Resources/
It should be the same for Tiger too. (Make sure you retain the file name as finder.png, with a small f, because it is case sensitive! If you dont, the icon wont appear on the Dock.) You may need to delete your Dock icon cache file for the change to take effect. You may need to find it manually, because I think the directories have different names under different installations. The file has a weird name called: com.apple.dock.iconcache. If you want to change things often, make an alias to the directory its located in. I think Tiger & Leopard have it in different spots.
If you want to change your Leopard energy saver icon back to the original type, instead of that butt-ugly spiral thing, its: /System/Library/PreferencePanes/EnergySaver.prefPane/Contents/Resources/EnergySaver.icns. You should replace this with one from Tiger, unless you know how to do the 2 icons inside the one file.
If you prefer the Tiger preferences icon too, you can simply find this inside the System Preferences.app directory in your main Applications directory. Its called PrefFile.icns, inside /Contents/Resources.
In Leopard, if you go to your main library directory (not the one under your user name), youll find a printers sub directory, with a HUGE amount of printer drivers. Unless you actually have all these printers, you can pretty much delete everything here which you dont have, and clear up some hard drive space at the same time.
Theres a huge amount of dictionary related stuff also in YourDrive/Library/Dictionaries, which you can also sod off if you dont need them. If you use the dictionary program though, you might want to keep them. Obviously.
In Mac OS X Tiger, (and probably other versions too,) to get an eject item on your Menu Bar for your optical disc drive, go to /System/Library/CoreServices/Menu Extras, and then double click on Eject.menu. If you have more than one drive, I think youll get a list of choices.
If youve got a file off the Internet, you will often get a warning message when you try to open it, even if its not an executable file. To remove this entirely, open the Terminal and enter: defaults write com.apple.LaunchServices LSQuarantine -bool NO To change it back, replace the NO part with YES. This may only apply to Mac OS X Leopard and above. Im not sure about Tiger. You may also have to restart or relaunch Finder, although I cant remember now.
Heres a tip for burning a CD / DVD with its own icon. Make a new disc image from a folder with Disk Utility, and when its done, open it and go to the information for the root level (of the image file). Along side that, open the information for the icon you want to use, so that the icon is visible in the information window at the top. Select it so that it has a glowing border and select copy from the menu, or press  + C. Then select the information window for the disc image and select its icon at the top left. Then paste! The icon you want to use should appear there at the top now, and a larger version below, if you have the preview section open. Eject the disc image, and re-open it just to make sure the icon has stuck. If so, you can then burn it. The icon should then appear for the CD / DVD instead of the usual generic optical disc icon. (Discs burnt in this fashion may not be readable outside of Mac operating systems.) + C. Then select the information window for the disc image and select its icon at the top left. Then paste! The icon you want to use should appear there at the top now, and a larger version below, if you have the preview section open. Eject the disc image, and re-open it just to make sure the icon has stuck. If so, you can then burn it. The icon should then appear for the CD / DVD instead of the usual generic optical disc icon. (Discs burnt in this fashion may not be readable outside of Mac operating systems.)
You can open old Mac Paint images in QuickTime 7, copy them and then save them as a different format, like PNG, with Preview. It seems the Windows version of QuickTime doesnt recognise them though.
John’s Tips For Windows XP!
Windows XP and other versions can have some really annoying “features” and problems. So here are some pointers to make it more bearable:
• Windows XP seems to think that zip files are folders, so to disable this weird handling, type this in to your Run box: regsvr32 /u c:\windows\system32\zipfldr.dll and do an immediate reboot after any messages. You will then simply need to re-associate zip files to your fave archiving program.
You should also be able to do: regsvr32 /u c:\windows\system32\cabview.dll, which I think should hopefully prevent search results from cabinet files.
•
Another annoyance is all that Windows Media Player junk in the context menus, especially if you don’t use it. To sod this off, enter this: regsvr32 /u wmpshell
• To remove NetMeeting from Windows XP, enter this text in your run box, or put it in a batch file for multiple uses: RunDll32 advpack.dll,LaunchINFSection C:\WINDOWS\inf\msnetmtg.inf,NetMtg.Remove When you reboot, a message will ask you about tidying up settings. Just click on Yes.
• Here’s one from The Elder Geek website on removing your CD drive from your Send To menu: Run GPEDIT.MSC, which is the Group Policy Editor. Then go to User Configuration > Administrative Templates > Windows
Components > Windows Explorer, then find Remove CD Burning features on the right, and set it to Enabled. This will work in Windows 7 as well.
• On some occasions Explorer will chuck some kind of various wobbly — for me usually to do with the Task Bar. To restart it, press Ctrl + Alt + Del to bring up the Task Manager. On the Processes tab, find explorer.exe and press the End Process button. This will take out all the icons on your desktop, the System Tray and various other business, but don’t fret! Just go to the File menu on the Task Manager and choose New Task, then type in explorer and it will all kick back in. :-)
• Sometimes you may run into a file that just wont get deleted, even after you restart your computer. One trick is to close Explorer and then use the command prompt to delete the
file. (Having the Open Command Window Here Power Toy add on makes this quicker to do on folders with long names too.)
• If you have shortcuts to your optical drive(s) on the desktop, depending on the disc you have inserted, Windows won’t always open this in the same fashion when you double click on the icon. Sometimes in worse scenarios, it will fail to update the contents and when you think you’re opening a normal folder, Windows might try and open up a DVD player instead. If you simply want to have access directly to the root folder, and not attempt to start playing an audio CD or the like, you can create a simple batch program with the contents of: Start (your drive letter): So if your disc drive was D, you would put: Start D: You can then make a shortcut to this batch file.
• Download Tweak UI also to sort out a lot more options and get a few tweaking programs made up ready to go by me, that do some of the above tips.
• To get rid of the eBooks folder from My Documents that is created by Adobe Acrobat Reader every time it loads, simply move the eBook.api file from C:\Program Files\Adobe\Acrobat version\Reader\plug_ins\ to the Optional folder on the same level, or delete it entirely.
Heres another beauty on removing the excess search entries in the Start menu: Open the Registry Editor and go to:
HKEY_LOCAL_MACHINE\SOFTWARE\Microsoft\Windows\CurrentVersion\Explorer\FindExtensions\Static. Under WabFind, WebSearch, and (if you have RealPlayer installed,) RealSearch, you can delete the sub branches of each one. You may want to leave the ShellSearch one there if you still want to use Windows built in search feature.
I had enormous troubles getting various media files to open with Media Player 6, in that they kept on asking what program to use EVERY time. The solution / kludge I came up with to solve it was to make a copy of mplayer2.exe and call it mplayer3.exe, and then associate
the files with that. Problem solved!
To run a program in a different priority, you can make a batch file with the following example contents: %comspec% /c start /BELOWNORMAL program_name.exe
Change the program_name part to the name of the executable file you wish to run. Change the BELOWNORMAL part to HIGH, LOW, ABOVENORMAL etc. I like to do this with Firefox and PowerDVD, because Firefox can be a big sweaty hog on some sites when youre playing a DVD, so I give higher priority to the DVD player and lower to Firefox. It saves you having to do it every time with the Task Manager then. You can just put the batch file with the program in the same folder.
To change the oddball way that Windows somehow thinks that the week starts on Monday (!) instead of Sunday, go into the Registry Editor, to HKEY_CURRENT_USER -> Control Panel -> International, and change iFirstDayOfWeek to 6, instead of 0. Thisll work in Windows 2000 & Windows 7 as well.
Pictures & audio files can be a pain when they dont show consistent details in Explorer. So, in the registry, go to HKEY_CLASSES_ROOT\SystemFileAssociations\audio, and set the Details to prop:Name;Size;Type;Write to show the modification date. Do the same for the Details part of the image section.
To edit your Open With list, which appears when you right click on a file, go to: HKEY_CURRENT_USER\Software\Microsoft\Windows\CurrentVersion\Explorer\FileExts\.extension\OpenWithList in the Registry Editor. (Replace the .extension bit with the one youre looking for.) In here, you can remove programs you dont want to have shown. I changed mine because I accidentally kept clicking on the wrong programs for certain files, when I was opening videos with VLC instead of QuickTime, which is my default for various extensions. It can be a good idea to export the branch of the file extension to a .REG file, which you can use again later, if programs change the entries again.
To edit your optical disc drive names (& possibly others), go to HKEY_LOCAL_MACHINE\SOFTWARE\Microsoft\Windows\CurrentVersion\Explorer\DriveIcons\ in the Registry Editor, and make a new key which matches the drive letter you want to change the name of, if you dont already have an entry there. Then off that, make a key called DefaultLabel. So, in my case, for my DVD drive, I have a registry entry of: HKEY_LOCAL_MACHINE\SOFTWARE\Microsoft\Windows\CurrentVersion\Explorer\DriveIcons\D\DefaultLabel
On the right side, where it says (Default), set the string value data to whatever name you wish. I just put DVD Drive in mine.
Make use of the Favourites menu in the Registry Editor too. That stuff is just an insane collection of settings, so if you want to find a particular place again, this is a great feature to make use of. See below, in the Windows 7 section about where these favourites are kept.
John’s Tips For Windows 7!
Windows 7 (which is really NT 6.1,) isnt quite as bad as I imagined, but there are some things you can change about.
Get yourself the Ultimate Windows Tweaker. It has a stack of options you can change in a flash.
Grab yourself Classic Shell to change around that slow old Start menu and make it like the tried and tested ones in previous Windowses. Its a piece of pee to install, and such a relief!
Microsoft have made security of Windows 7 a pain, and even as an administrator, which most of you who own your computers are, you cant access certain files and folders. So, the answer is a registry file called something like GrantAdminFullControl.reg. And you can download it here. (Im not sure if this is different at all for the 32 bit version of Windows 7 or not. But this is the one I use for the 64 bit version of Windows 7 Professional.) After you use it (at your own risk), you can just right click on a file or folder, and choose to have control of it. I had to use this to buzz off the horrid version of Wordpad and Paint, in order to put in the Windows XP version. On a side note to this, be aware that gaining access to junctions may produce confusing results to those who dont understand how they work. (Such as the Application Data one, which will trick you into thinking there are more copies of it inside it that go on forever.)
Microsoft really screwed up the wallpaper feature this time, with your images being changed to a lossy JPEG image no matter what you choose. The work around is thankfully simple. Convert any PNG or TIF files you may
have to BMP, and then change the extension to JPG. Yes, the file is still a Windows Bitmap, but it will not suffer the conversion, as Windows will think its been done. You will then have no compression artifacts on your wallpaper.
Unless you like your display looking like an out of focus rear projection screen or a monitor with poor convergence, heres how you turn off Clear Type: Go into the Control Panel, then Display. Next find the bit about adjusting the Clear Type Text. Uncheck the box about it being turned on, and then choose any old sample until you get through the whole wizard dealie. It should then be off. Easy as pie really. (See more below.)
To enable God Mode, which is just a collection of a large range of settings, create a directory called: GodMode.{ED7BA470-8E54-465E-825C-99712043E01C} It will automatically change icons and when you open it, there will be multiple system options inside.
To enable What U Hear for recording with a Sound Blaster sound card, go into the Control Panel and then to the Sound icon. Choose the Recording tab, then right click in a blank area of the window. Next choose Show Disabled Devices. Set What U Hear to Default, and you can record from stuff like games and whatever else youre listening to.
There was an article linked here about restoring your task bars quick launch feature, but its gone. So I will try to recreate the steps to doing this, myself. It causes no issues with Classic Shell as far as the way I have it set up, but may not want to use the large icons option though if youre using the Classic style. You can then use the quick launch icons to start multiple copies of programs just like you should have been able to, without the icons vanishing and becoming the task bar buttons. I think you have to unlock the task bar 1st, then choose to have a new tool bar. You do this by right clicking in an empty space on the main task bar area, then selecting Toolbars and then the New toolbar
sub menu. Make your way to: C:\Users\Your Profile Name\AppData\Roaming\Microsoft\Internet Explorer\Quick Launch and choose this location. What it has to do with f**king Internet Explorer, I have no idea, and you dont need to have this browser present on your installation for this to work either. Anyway, you can then expand the left side as long as you leave the task bar unlocked. I think there may be slightly more to it, but as I already have my copies of Windows 7 set up properly, I dont want to fiddle with it. But yeah, you should get the area to the side where you can drag in shortcuts by this stage. Make sure you dont delete the directory you specified either, or all the stuff will buzz off.
Unlike Mac OS X, (apart from the fizzing password dialogue box issue,) if you disable ClearType in Windows 7, it still leaves traces of it behind. (What do you expect from MS?) If youre sick of seeing the remnants of ClearType in parts of Windows, even with it disabled, you can prevent SOME of it by changing the font substitute of Segoe UI to a bitmap font, like MS Sans Serif. The location to change this is in the registry in: HKEY_LOCAL_MACHINE\SOFTWARE\Microsoft\Windows NT\CurrentVersion\FontSubstitutes. Where it says Segoe UI, double click on the entry and then type in MS Sans Serif. As this is a bitmap font, it will have no edge anti-aliasing at all, but I think thats a better choice than suffering with Clear Type. You may have to delete the Segoe entries of the Fonts branch of the tree above too. Just find all the Segoe fonts, and change the entries to nothing. You may want to backup your registry before doing this! Stuff such as where it says Documents Library in the open dialogue boxes will now have no Clear Type rainbow effects on the text. It will also change your Start menu text where it says what edition of Windows youre using, the welcome text on the loading screen and the help text, although strangely it will still seem to be anti-aliased, no matter what. But it never forces Clear Type on you, unless you specifically want it. Now lets all cheer and say Death to ClearType!
If youve used earlier editions of Windows before and youre looking for your SendTo directory, its now located at:
C:\Users\YourName\AppData\Roaming\Microsoft\Windows\SendTo
You can also just type in shell:SendTo in the usual Run dealie.
Heres a new one I just discovered. (5 March, 2018.) After getting some pictures off the net, I noted that Windows was putting this block thing on the files, because its too dumb to realise that picture files pose no threat. Anyhoo, to turn this nuisance off, open the Group Policy gizmo (run gpedit.msc) and then go to User Configuration. After that, go to Administrative Templates, Windows Components and then Attachment Manager. On the right, find the part which says: Do not preserve zone information in file attachments. Double click on it, and set it to enabled. Whats odd, is that it sounds more like something to do with e-mail than anything, but it still seems to affect files from your web browser as well. The information is part of the NTFS, and can also pass the setting to other computers running Windows XP & up. I was surprised to find the setting in Windows XP also, but its never affected me.
If youre not using Windows Update, you should also be able to disable the Windows Modules Installer service, which sometimes loads a strange, irrelevant Trusted Installer program when running certain other programs.
For some odd reason, Windows 7 doesnt show shortcut underlines on buttons or menus by default. You can turn this back on by going to the Ease Of Access Centre in the Control Panel. (Make sure you dont have it hidden in the Group Policy Editor.) Once there, go to the section about making the keyboard easier to use. Enable the tick box for Underline keyboard shortcuts and access keys. This should work straight away. If not, try restarting or log out from your account and back in. You can then see which keys to press while you hold Alt, instead of having to guess at it.
One thing that can be a real pain in Windows 7 is opening a context menu on an image file, and accidentally selecting Set as desktop background
or whatever it said. This wasnt in Windows XP, so its become a new nuisance for me. There is no undo feature, so if you slip, you need to go back to the Personalise section from the desktop, or use the Control Panel to revert back, if you can find which directory had your last image. If you want to remove this context menu option, just go to the Registry Editor and head to HKEY_CLASSES_ROOT\SystemFileAssociations\. From there, look for common image formats that Windows recognises, like DIB, BMP, TIF, TIFF, JPEG, JFIF, JPE, JPG, PNG & GIF. Under each one is a branch called \Shell\SetDesktopWallpaper. If you delete the one called SetDesktopWallpaper, the context menu item will be removed for this type of image. You may wish to export from your registry to REG files if you wish to restore this.
For some reason, Windows 7 doesnt have the Game Controllers Control Panel item, JOY.CPL, enabled by default. In fact, Microsoft have set it to not load in the registry, which seems odd. To fix this, open the Registry Editor, and head to: HKEY_LOCAL_MACHINE\SOFTWARE\Microsoft\Windows\CurrentVersion\Control Panel\don't load. On the right side, delete the item named joy.cpl. If you dont have permission, right click on this current dont load branch on the left, and choose Permissions
, then Advanced. Head to the Owner tab, and set it to yourself. It may be set to Trusted Installer instead. (Although who knows how trustworthy that really is?) Once changed, you can then delete any of the CPL files listed on the right side. You may wish to delete the entire branch if you dont want any Control Panel items hidden. You can also make shortcuts to CPL files and load them directly.
One thing that can be annoying with Windows 7, is the pop-up buttons that appear above the Task Bar buttons. This can make it a pain when you want to resize the Task Bar from that position, and a new button is in your way. One way Ive seen to get around this, is to make a registry key that will delay these extra buttons from appearing straight away. Open the Registry Editor, and head to: HKEY_CURRENT_USER\Software\Microsoft\Windows\CurrentVersion\Explorer\Advanced. On the right, make a new DWORD (32 bit) Value. Call it ExtendedUIHoverTime. Change the radio buttons to have Decimal selected, and in the Value data: text box, enter a time in milliseconds. (1000 ms = 1 second.) This will then set the delay of these pop-up buttons. I put 1500 for my value. You will need to restart Windows 7 for this setting to kick in. (This may apply in Windows Vista too.) If I can find a way to disable the extra buttons entirely, I will add it here. This may be undesirable for those of you who like your task bar buttons grouped.
To find your Registry Editor favourites, if you actually made any, head to: HKEY_CURRENT_USER\Software\Microsoft\Windows\CurrentVersion\Applets\Regedit\Favorites You can export this to a REG file if you wish to back these up, or use them on another PC. The location is the same for Windows XP as well.
You can prevent the OS from asking you to search on the web for programs to open files that have no association, by going to: HKEY_CURRENT_USER\Software\Microsoft\Windows\CurrentVersion\Policies\Explorer in the Registry Editor, then adding a new DWORD (32 bit) Value called NoInternetOpenWith & setting the decimal value to 1. When you try to open a file from then on, youll only be asked what installed programs youd like to use.
The directory: C:\Users\Name\AppData\Local\Microsoft\Windows\Temporary Internet Files\ has a desktop.ini file which prevents the contents from being seen. If you do a search, open this file and erase its contents, then re-save it, the directories here can be seen. You may be able to clear up some junk then as well.
Be sure to check through the Task Scheduler for stuff you dont want to run. There are quite a lot of things in here which should run, so be careful. One of the bizarre ones you can disable is Power Efficiency Diagnostics. It also puts a bunch of files under: C:\ProgramData\Microsoft\Windows\. I never even knew about this until January, 2024. Unless youre completely mental & pedantic about how much juice your PC uses, this one can fig off. Other stuff in here seems to be set to all weird times, with some kind of assumption that youll have your computer on while youre asleep.
Disable everything under Application Experience, unless youre working with the Microsoft Customer Experience Improvement Program. Also disable the Autochk task, Customer Experience Improvement Program (unless youve signed up for this), and WinSAT under Maintenance to your preference. Leave System Restore enabled, I would say.
Another thing that drove me bonkers with Windows 7 was the automatic window arranging cr*p. To turn this off, go to the Control Panel, and then the Ease Of Access Centre. Go to the bit about making the mouse easier to use, and select the tick box for preventing windows being arranged automatically, etc. You should save your mouse cursor scheme BEFORE this as well, as this will screw up your current selection. Anyway, enabling this option should also prevent the annoying problem of windows becoming restored or un-maximised by dragging the title bar.
Microsoft gave their own HLP files the finger since Windows XP and earlier versions. In Windows 7, programs which rely on these files for their help wont display them. One solution is to copy the help program over from the likes of Windows XP. Head to the Windows directory (or WINNT for Windows 2000) & grab up winhlp32.exe, then copy it to the Windows directory in Windows 7. I think thats all you need to do. There may be another placeholder file that needs replacing, but its safe to clear it off. If you swap over the likes of Paint with the older version, and want to use its help file too, you should also copy over NTArt.chm to your C:\Windows\Help\ directory. This contains variously shared images for multiple programs.
One of the more shady things that Windows 7 may do, is try to access various stuff on the Internet behind your back when running certain games. It can often cause extended loading times as well. Here are some various solutions: Run this command line: RegSvr32 -u C:\Windows\System32\GameUX.dll or for the 64 bit version of the OS: RegSvr32 -u C:\Windows\SysWOW64\GameUX.dll
If you still have issues, as a last resort, you can delete the GameUX.dll files, or store them in an archive if you think you might want them back.
Also run a monitoring program like TCPEye and add any suspicious I.P. addresses to your firewall. For the built-in firewall, you will need to make a new inbound rule with a custom setting. Tell it to work with all programs, have a protocol type of any, and then make a list of remote I.P. adresses for it to apply to. You will finally need to specify that it blocks these addresses. A few of the addresses I have in mine are: 104.68.26.118, 65.55.5.170, 65.55.162.26, 23.46.40.155, & 23.77.151.88, which are to do with Microsoft and Akamai.
Another pain in the bum aspect of Windows 7 is how the Task Bar now seems to glue buttons from the same program next to each other. Even though you can now rearrange the buttons, you cant seem to separate ones of the same program, even if the windows are from separate instances, and even if you have Task Bar buttons set to Never Combine. Im not sure if there is a solution to this, but I will list one, if I find out. You can make duplicates of programs though, such as WordPad, and if you run the 2nd copy, the Task Bar wont group it to the originally named WordPad. If that makes sense. Its not a great solution though.Space Saving:
To disable hibernation, head to HKEY_LOCAL_MACHINE\SYSTEM\CurrentControlSet\Control\Power\ in your Registry Editor, and set the dealie which says: HibernateEnabled to 0. Then restart your computer. This will then erase the huge hibernation file in the root level of your boot drive. Obviously dont do this if you wish to use the hibernation feature. There are a tonne of PNG & JPG files under your Windows installation directory, which are bloated up with extra Adobe $#!+ that Microsoft never bothered to trim out. In fact, some of the images have more junk than the base image size. It can be a good idea to search for all images with these extensions, and run them by a trimmer program, like JPEG & PNG Stipper, and even jStrip. You can get a few MB of space back then as well. If youre not running Windows Update, you should be able to delete the contents of C:\Windows\SoftwareDistribution\Download\ to potentially get a couple of GB of space back. However this may vary. It all depends on who installed your OS, and if they used Windows Update as well. If you did it yourself, it might not have much in this directory at all. (I would also read up about doing this 1st, to be certain.) You can also find a huge file under: C:\Windows\SoftwareDistribution\DataStore\ called DataStore.edb, which you can also delete if youre not using Windows Update. Like before, this may only be small if Windows Update was never run. Keep in mind that if you ever change your mind, and want to use Windows Update for something, removing this stuff could cause problems. You can also find a bunch of big log files under C:\Windows\SoftwareDistribution\DataStore\Logs\, that should be safe to remove as well. You can trim up a few more MB of space, if you remove the sample music & images under C:\Users\Public\, but one of the tunes is pretty nifty, and the pictures are quite nice, so Ill be keeping mine. You may find large log files under C:\Windows\Logs\CBS\, including ones that are compressed in cabinet archives. These are usually safe to delete. Some people have reported this directory exceeding 2 GB, which is pretty extreme for log files! If youre not using Windows 7s built in search feature, you should be able to delete the files from C:\ProgramData\Microsoft\Search\ as well. Ive got nothing in mine, and theres been no detrimental effects. The files under C:\Windows\Help\Windows\en-US\ arent overly efficiently written internally, so its a good idea to set this directory to be compressed.
Other Tips
To have your icons displayed in full colour in Windows 95, without the Plus pack, simply go to the registry editor and make your way down to: HKEY_CURRENT_USER\Control Panel\desktop\WindowMetrics\. If there isnt a key there already called Shell Icon BPP, make one up as a text type, with the spaces between the words. Then, set the value ideally to match your displays colour settings. I put mine on 24, but you can also do 16 as well. Those icons which have more than 16 colours will then display them in the greater range.
In Windows, QuickTime installs a load of extra language support, whether you speak all those languages or not. Fortunately, you can delete all the ones you dont need. Find all the directories that have a .lproj extension, and just delete all the ones you dont speak. As I only speak English, I just deleted all the ones that didnt start with en. I saved about 24.5 MB doing so.
To turn off the image smoothing in Opera, like my tip above for Pale Moon / Firefox, edit or create your user.css file under \Opera\styles, (in Windows anyhow,) and put in it:
img { -o-scaling-method: fast }
img { image-rendering: -o-crisp-edges; }
This worked for me with version 12.
In various versions of Windows, if you have an ATi video card, you may end up with a context menu that allows you to access the settings from just about anywhere. Sometimes this can be a bit annoying when you accidentally click on it, especially when you never fiddle with the settings anyhow. If you wish to remove it, find: HKEY_CLASSES_ROOT\CLSID\{5E2121EE-0300-11D4-8D3B-444553540000}, and delete it. Check first that it mentions the ATi Catalyst dealie, before you clear it off. The Prog ID bit should say: Catalyst Context Menu.
Heres a batch file you can make for various Microsoft operating systems, which will create a text file from the directory listing of a drive, or directory. This is how I have it anyway:
@ECHO OFF
D:
DIR /B /S /O:GEN >C:\OpticalDiscFiles.txt
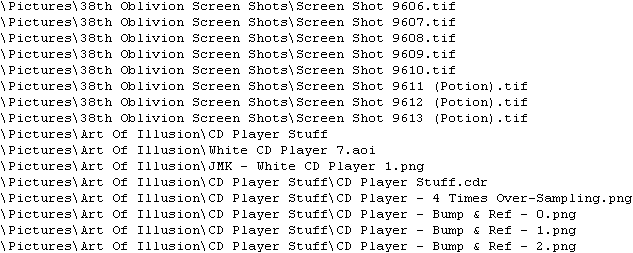 This will list the contents of drive D and put the result into a file called OpticalDiscFiles.txt in the root directory of drive C. You can change what drives you want and the file name, of course. If you open this in WordPad, use the MS-DOS Format option in the open dialogue box. That way any extended characters will be correct in Windows. Save it as a Text Document and it will then have the correct extended characters by default when you next open it. If you intend the text file to show files on other computers which may not be running Windows, you can get WordPad to do a mass replace of the text which says D:, by pressing Ctrl + H, entering D: in the top field, and nothing in the bottom. Change this of course for other drive letters relevant to you. See an example image to the left of how the file should end up looking. This will list the contents of drive D and put the result into a file called OpticalDiscFiles.txt in the root directory of drive C. You can change what drives you want and the file name, of course. If you open this in WordPad, use the MS-DOS Format option in the open dialogue box. That way any extended characters will be correct in Windows. Save it as a Text Document and it will then have the correct extended characters by default when you next open it. If you intend the text file to show files on other computers which may not be running Windows, you can get WordPad to do a mass replace of the text which says D:, by pressing Ctrl + H, entering D: in the top field, and nothing in the bottom. Change this of course for other drive letters relevant to you. See an example image to the left of how the file should end up looking.
I use batch files like this for every time I make a new backup DVD, so I can quickly find which disc has what files in the future. But it will work for any kind of drive of course. You could also change to a specific directory after specifying the drive too, if you wanted. If you use my Text File Searcher program, you can rapidly search through such text files, if theyre all in the same directory.
I have a Pegasus Imaging MJPEG codec which I wanted to transfer from my now dead 2006 PC, to my new 2023 PC. You might have something similar. Heres the procedure I used to get it working in Windows XP: Copy the PVMJPG30.DLL file and stick it under the System32 directory where Windows is installed. I then ran regsvr32 PVMJPG30.DLL as well. Next, go to the registry editor. Head on down to HKEY_LOCAL_MACHINE\SOFTWARE\Microsoft\Windows NT\CurrentVersion\Drivers32, then make a new string entry on the right called: vidc.mjpg, and put in the dll files name: pvmjpg30.dll
Youll then see it in the likes of VirtualDub for instance. You will also need to enter your registration information. This is kept under: HKEY_LOCAL_MACHINE\SOFTWARE\Pegasus Imaging\PICVideo 3 M-JPEG\ If you need to read your old registry files, try a program like RegView. I cant hand out my own codes of course.
Under the 64 bit version of Windows 7, add the DLL file to C:\Windows\SysWOW64\, then run: regsvr32 C:\Windows\SysWOW64\pvmjpg30.dll. It wont work from the usual System32 directory. In the registry, go to HKEY_LOCAL_MACHINE\SOFTWARE\Wow6432Node\Microsoft\Windows NT\CurrentVersion\Drivers32 to add the part which says: vidc.mjpg, and then the DLL file name as what it should look for. Again, you will need to enter in your registration codes, or it will act like a trial version.
If youre running VLC under Windows, and are experiencing tearing in videos, try setting the output module to DirectX (DirectDraw) video output. Youll probably need to go to the advanced settings for this.
VLC Aspect Ratio / Crop Conversions:
16:10 = 8:5
2.21:1 = 221:100
2.35:1 = 47:20
2.39:1 = 239:100
1.85:1 = 37:20
Video & Audio Processing + Conversion Tips
Do you want to convert an interlaced video into non-interlaced / progressive with double the original frame rate? Heres how you can achieve this with JES De-Interlacer. (Which is for Mac OS X Leopard and up, on both Intel & PowerPC CPU based Macs. I think there are actually older versions of it too, which should work on earlier revisions of Mac OS X.) Normally if Im doing DVDs, youre going to be using interlaced videos anyway, because you cant have 50 f.p.s. video on a DVD. Not that fits the DVD standard anyhow. But what if you want to have a non-interlaced video that you dont want dropped back to 25 f.p.s.? Well, heres how to go about a conversion! Start JES De-Interlacer, and make sure you select the correct field order. (DV files are bottom field 1st. MJPEG is usually top field first. But you may have a video that got muddled up, so you can manually specify it.) Next go to the Project tab, and choose Custom. Set the blend method to Telecine. Set the video size to 768 pixels wide and 576 pixels high, unless for some reason you need to keep the 5:4 aspect, in which case it should then be 720 × 576 pixels. Set the frame rate to 50 Hz. In the Output tab, set the Progressive (out) tick box to be on. Also tick Use Canvas, and set the same dimensions of 768 × 576 pixels. (Unless you aim to scale to some other size.) Choose fit within and then choose the compression. If you choose to use Export instead, which has more compression options, you can scale the movie from the options listed in that section. You may need a LOT of disk space for this as well, from my experience, and this method is quite slow, as it seems to make up a temporary movie 1st, which is probably uncompressed. So I would say the Photo JPEG option is probably better from the Direct choice. But this uses a shed load of disk space too.  (Like about 422 MB per minute. Or 24.7 GB for an hour. So this would hopefully seem better than DV quality, but yeah, a bit much space really.) Of course you can then use FFMPEG or MPEG Streamclip to compress down to a small MP4 or MOV file. (Like about 422 MB per minute. Or 24.7 GB for an hour. So this would hopefully seem better than DV quality, but yeah, a bit much space really.) Of course you can then use FFMPEG or MPEG Streamclip to compress down to a small MP4 or MOV file.
I thought that only newer versions of FFMPEG could do this, but the versions I have from 2011 can do it after all! Hooray! So this may be a better choice for really long videos that are over a couple of minutes in duration. As FFMPEG is available for multiple operating systems, its probably the more flexible choice. Heres an example of converting a MPG file from a DVD to a MJPEG video at 50 Hz:
ffmpeg -i Input.mpg -vf "yadif=1:-1" -vcodec mjpeg -r 50 -b 16000k -ac 2 -acodec pcm_s16le Output.avi
The -1 seems to determine the field order. If you change it to 1, I think it swaps it. You need to put -r 50 to set it to 50 f.p.s., and I put the bit rate up to a higher level of 16000 kbps, which made it less blocky for this codec. This makes it more suitable for me to put into VirtualDub to crop, trim and finalise with DivX compression.
You can also use later versions of HandBrake to do this method of de-interlacing. Probably from around version 0.99 or so. The older 0.93 one wont do it. You need to select bob as the de-interlace method and then set the frame rate to 50 Hz. But your source video
must have the correct field order to begin with. Theres no option to swap fields. Youll know if its wrong, because the output video will look shaky / stuttery.
If you have a video camera with those quirky MOD files, well no, theyre not music modules, but actually MPEG 2 video, with the audio also. And if you want to get them into iMovie on your Mac for editing, this can be a big fat pain, because it wont recognise them from a bar of soap. At least version 6. Better quality video cameras will provide a DV stream, which is of a much higher bit rate, and is the standard that iMovie accepts, but alas, you need to convert MOD files, if you want to add them to your project. The best way I found, is to use FFMPEG, which is completely free. Its also for Linux and Windows, and no doubt other OSs as well, so you can even convert elsewhere. I had a copy already from another Windows front end, so I just used that. And with a simple batch file in the same directory as the program and source video, its a breeze to convert. Just make a usual text file, and rename it to have a .BAT extension, then open it in Notepad. Next, in the actual file, enter something along the lines of: ffmpeg -i Source.MOD -vf "fieldorder=bff" -target pal-dv Output.dv
You need to put the field order part, because DV is in reverse to most other videos which are interlaced. And it will flicker if its played in the wrong order.
VLC should be able to play MOD files also, if you change the extension to .MPG
On Mac OS X, your best bet is to probably use MPEG Streamclip, and if youre desperate enough, buy the MPEG 2 component for QuickTime. You may be able to use Perian with it, but I heard that some people had issues with it disturbing your DivX installation, and also issues with iMovie. For those who are interested, I made a front-end program for FFMPEG for Mac OS X. You can check my Downloads Page to get it. Its called AV-Friendly. It does not come with FFMPEG though.
To convert the DCT or MAD videos from the Need For Speed games, such as N.F.S. 2 and High Stakes, you can use FFMPEG as well. Heres an example of a line you can use in a batch file for instance: ffmpeg -i Source.MAD -vcodec mpeg4 -b 4000k -acodec pcm_s16le Output.avi
FFMPEG can pad out videos to a larger size, which is useful to add a video of a different aspect ratio to the likes of iMovie projects. To add a colour of your choice to the border area, do so in this manner: -vf "pad=960:720:0:88:9900CC"
This example will add an extra 88 pixels at the top & bottom to bring it up to 960 × 720 pixels, and give a purple border. The last 6 digits are basically the hexadecimal representation of the colour.
To have FFMPEG strip the audio out of a video without recompressing the video, you can do so like this:
ffmpeg -i InputVideo.mp4 -vcodec copy -an OutputVideo.mp4
If the video is short, the processing time should be super fast. It may even seem instantaneous. This can be useful if you just dont want the audio, or intend to add other audio tracks later.
Heres how you can extract the audio stream from a MP4 file:
ffmpeg -i InputVideo.mp4 -vn -acodec copy Output.m4a
You can also convert M4A files into WAV for easier editing:
ffmpeg -i InputAudio.m4a -acodec pcm_s16le Output.wav
Remember that youve still converted a file with lossy compression into a non-compressed wave file. It wont magically make the quality better. Use pcm_s16be for big endian instead, but this probably wont work for WAV files but it will for AIFF.
You can
use newer versions of VLC to record video, which is handy if you want a portion from a DVD. The output in this case will be a MPG file, often with multiple audio channels. If you want to convert it to say, a MJPEG video in just stereo for editing, heres an example you could try:
ffmpeg -i Input.mpg -vf "fieldorder=bff" -vcodec mjpeg -b 8000k -ac 2 -acodec pcm_s16le Output.avi
You can leave out the part that says: -vf "fieldorder=bff" if your source isnt interlaced. I found that this was the correct way to do it though for interlaced sources when I was converting up to 50 f.p.s., non-interlaced, with HandBrake, during my testing of different methods.
Heres an example of how you can scale a video to a different size, while using a lossless audio stream (in stereo):
ffmpeg -i Input.mp4 -vcodec mpeg4 -b 18000k -s 1280x720 -acodec pcm_s16le Output.mov
You could drop the video bit rate if you didnt want it that high, but if you want really good quality, FFMPEG will tend to use this as the upper limit. In some cases, it may not reach that high anyhow. MOV files will also accept the audio as big endian, so you can also put: pcm_s16be
Changing the volume of a video, or even an audio file, is fairly easy with FFMPEG as well. The normal level is considered to be 256, so if you want to halve the volume level, you would put: -vol 128 in the command line with the rest of the stuff youre doing. To double the volume, I suppose you would put -vol 512 instead. Be careful though when you make an increase, so that you dont clip the audio. This is where the peaks lose their shape and become flat at the highest possible level. (Its like increasing the brightness of a picture and losing detail when you push the upper levels into white.) In this situation, it may be best to extract the audio first, and check in an audio editor, to get a visual representation of the wave form.
Sometimes you may wish to recombine audio & video streams into the one movie file. An example to do this in FFMPEG would be:
ffmpeg -i MyVideo.mp4 -vcodec copy -i MyAudio.m4a -acodec copy FinalFile.mp4
If youre using an AIFF file or WAV file, youd probably be best to use a different container, like MOV or AVI.
You can add multiple filters to FFMPEGs command line by separating them with a comma. For example: -vf "filterblah=2, filterdoodad=3", but obviously youd use the correct filter names.
You can containerise raw DV files into AVI files with no re-compression in the following method:
ffmpeg -i MyVideo.dv -vcodec copy -acodec copy OutputVideo.avi
This seems to work anyway. I did a test with it in Windows DVD Maker in Windows 7. As for how it interprets field ordering, I couldnt say.
How about doing a video in reverse? I did these back in 2011 using AVI Synth (for Windows). I just used a copy that came with Auto Gordian Knot, but you should be able to download it on its own. It then allows you to open AVS files, (which are like a script,) with video players and editors. In my script, I just have: Reverse(AVISource("VideoName.avi")), and you can then drag the AVS file into the likes of VirtualDub, and it will automatically be backwards, including the audio. You can then trim, resize, crop and finalise it with whatever compression you want. You can get some pretty amusing results if you use your imagination, especially with pouring liquids, tearing things up, and even writing. Be careful though with interlaced video, because the fields will effectively swap. I think. It can be a good idea to convert to full 50 Hz video before reversing, but it may depend on your final intentions.
You can use MPEG Streamclip to convert M4A files to MP3, (without using an intermediate file, like WAV or AIFF,) for certain non-computer players, but youll be recompressing a lossy compressed file into another one, so youll lose a bit of quality. Its therefore best to use a higher level bit rate. This program can also trim videos and audio files, in case you didnt know.
iMovie Tips
Im using iMovie 6 on my Macs, but some of these tips may apply to other versions as well.
iMovie has a tendency to make pictures you drag in, a little bit brighter. Actually, it seems to notch up the gamma level. If you want to get your still images a little closer to normal, drop their gamma level to about 0.8 in a bitmap editing program. (Or 80%.) When you put them into iMovie, the original colouring should return.
To get still images to fit nigh on perfectly to your video size, without black borders, resize 4:3 aspect pictures down to 786 × 576 pixels and 16:9 aspect ones to 1049 × 576 pixels. (For PAL DV projects.) Its always best to scale down to these resolutions from a larger image of the intended aspect ratio.
If you want to add some cool animations to announce new chapters or segments in your projects, check out my titler programs, which I can send to you for free!
If you want to convert videos of a different frame rate to use in your iMovie project, and dont want them coming out jerky, a very useful program which can deal with this, is JES DeInterlacer. (Which is freeware.) You can choose whether to re-interlace to 50 f.p.s. or non-interlaced at 25 f.p.s. (And no doubt the NTSC rates, if youre doing it the other way.) It can handle pretty much any weird frame rate you throw at it, and will blend it into the finalised result. It can also crop videos and add borders for aspect ratio changes.
See the Other Tips above for dealing with MOD (video) files.
One really annoying thing that iMovie 6 does when you 1st start with it, is making a zoom effect on images that you drag in. Its really hard to find the solution too, because it isnt under the options. What you need to do, is drag your image into the time line, and then select Media on the right side. There should be a button that becomes available called Show Photo Settings. Drag the top slider control over to the left so that it reads as only 1 for the zoom level. There is also a thing called Ken Burns effect, whoever the f**k that is, and a speed control as well. You shouldnt need to touch either of these. The setting should remain like this then for all future projects regarding images, and you can then adjust the timing as well, by pressing + I for each image.
Copying / Duplicating Personal DVDs
(Of the kind you would watch in a DVD player.)
Making a backup copy of your precious memories could be one of the most important things you do, to prevent the loss of video action from your own DVDs that are getting a bit scratched, grubby or cracked. If you want to do this before its too late, here are some tips for Windows, and Mac OS X. Although this is also a good idea if you want to share your DVDs with family members and friends.
If you want to rip a DVD directly to an ISO file in Windows, one of the best programs is DVD Decrypter. It mayve been aimed at backing up commercial DVDs, but thats no reason for it not to work on your own home made discs. From the Mode menu, simply select: ISO, then Read. The source should be your DVD drive, and the destination should be an ISO file, which you can choose the location of, on another writeable drive. (Like your hard drive.) This will also handle dual layer discs by creating a MDS file for certain burning software to more accurately recreate the original layer break in the right spot.
Another option is DVD Shrink. Make sure you set everything to no compression for a 1:1 copy. You only want compression for putting dual layer DVDs onto single layer ones. (And this will reduce the quality of course.)
On Macs, Disk Utility should be able to copy any drive to an image file, and for unencrypted DVDs, this should work as well. The program will probably use a CDR extension, which isnt actually a Corel DRAW file! You should be able to rename it to ISO for burning on other computers if your Mac doesnt have a DVD burner, like my iMac G4 and MacBook.
On Windows, if you want to burn an ISO file, BurnCDCC is a basic and competent program, which lets you choose the burn speed, and it works fine with dual layer DVDs.
CDBurnerXP is another free program which can burn ISO files, and its also great for just making up DVDs & CDs of your files, when you want to back things up. You might want version 3-ish for Windows XP, and version 4 for Windows 7. This is a pretty good upgrade too, but it wont read old version 3 DXP files.


|
|


